The AeroPress is a revolutionary coffee press that has become a favorite among coffee enthusiasts for its ability to produce smooth, rich coffee with minimal bitterness and acidity.
Combining the best of several brewing methods, including French Press and Espresso, the AeroPress offers a unique and versatile brewing experience. Also its compact and lightweight design makes it ideal for both home use and travel.

History of AeroPress
The AeroPress was invented in 2005 by Alan Adler, an accomplished engineer and inventor with a deep passion for coffee. Adler aimed to create a coffee maker with the intention of reducing acidity and bitterness in his daily cup of coffee.
The result was the AeroPress, which quickly gained popularity for its simplicity and efficiency. Today, the AeroPress is celebrated worldwide, with dedicated competitions like the World AeroPress Championship showcasing innovative brewing techniques.
Discover more about Aeropress and his inventor Alan Adler in this interview for Fast Company.
Benefits of AeroPress
The AeroPress offers numerous advantages that contribute to its widespread appeal:
- Versatility: Capable of brewing a wide range of coffee styles, from espresso-like shots to full-bodied coffee.
- Portability: Its compact and lightweight design makes it perfect for travel, camping, or enjoying coffee on the go.
- Ease of use: The AeroPress's straightforward brewing process takes just a few minutes and is beginner-friendly.
- Quick cleanup: Disassembling and rinsing the AeroPress is quick and easy, making maintenance a breeze.
- Consistent results: The precise brewing process ensures a consistently delicious cup of coffee every time.
Grind size for AeroPress
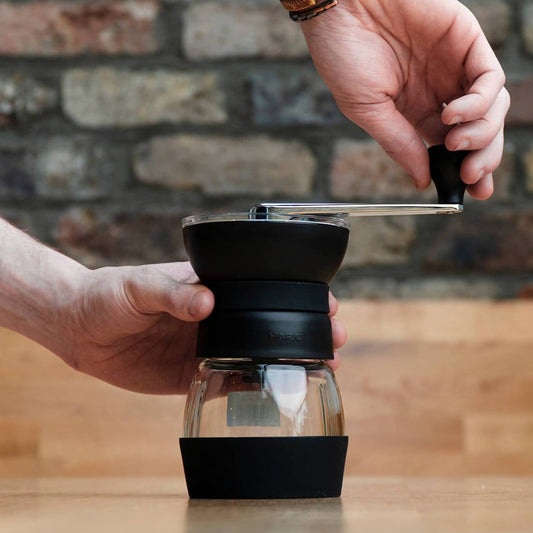
The grind size is crucial for achieving the best results with your AeroPress. We recommend a medium-fine grind, similar to table salt, for optimal extraction and flavour. Using a high-quality coffee grinder, such as a manual coffee grinder or an electric coffee grinder, will help you achieve the perfect grind size.
Consistency is key, so investing in a reliable grinder is well worth it.
How to use AeroPress
Brewing coffee with an AeroPress is simple and straightforward.
Follow these steps to create a delicious cup of coffee:
1. Assemble the AeroPress: Place a paper filter into the filter cap and rinse it with hot water to remove any paper taste. Attach the filter cap to the brewing chamber and place the AeroPress on top of your coffee mug or carafe.
2. Add coffee grounds: Add your medium-fine coffee grounds to the brewing chamber. We recommend using about 14-18 grams (1-2 tablespoons) of coffee per serving.
3. Pour hot water: Heat water and pour it over the coffee grounds. As suggested by Aeropress, the water should be 175°F (80°C) for dark roasts and 185°F (85°C) for medium and light roasts. Fill the chamber up to the desired level, usually between the "1" and "4" marks on the AeroPress.
4. Stir and steep: Stir the coffee and water mixture for about 10 seconds to ensure even extraction. Insert the plunger into the brewing chamber and let the coffee steep for 60 seconds.
5. Press the coffee: Slowly press the plunger down, using steady pressure until you hear a hissing sound. This should take about 20-30 seconds.
6. Enjoy: Remove the AeroPress from your mug or carafe and enjoy your freshly brewed coffee. You can adjust the strength and flavour by adding more water if desired.
AeroPress methods
There are several methods for brewing coffee with an AeroPress, each offering a unique flavour profile and brewing experience.
Here are two popular methods:
1. Standard method: This traditional method involves placing the AeroPress directly on top of a coffee mug or carafe and following the steps outlined above.
2. Inverted method: This is the method we use in Happy Out. The AeroPress is assembled upside down, with the plunger at the bottom and the filter cap at the top. Coffee grounds and water are added, and the mixture is stirred and steeped. The filter cap is then attached, and the AeroPress is flipped over onto a mug or carafe before pressing the coffee. This method allows for longer steeping times and more control over the brewing process.
Got curious about the inverted method? Ready more!
Best AeroPress accessories
Enhance your AeroPress brewing experience with these high-quality accessories:
1. Coffee grinder: A high-quality coffee grinder is essential for achieving the perfect grind size. Options like manual coffee grinders and electric coffee grinders provide consistent results.
2. Fellow Prismo: The Fellow Prismo is a coffee maker attachment designed specifically for the AeroPress. It features a pressure-actuated valve and a reusable metal filter, allowing you to create espresso-style shots with your AeroPress.
3. Aeropress coffee filters: Elevate your coffee game with Aeropress Coffee Filters! Experience smooth, grit-free coffee thanks to micro filtration designed for a finer grind.
Troubleshooting common issues
If you encounter any issues while brewing with your AeroPress, here are some common problems and their solutions:
1. Weak coffee: If your coffee tastes weak, try using a finer grind size, increasing the amount of coffee, extending the steeping time or increase the temperature of the water.
2. Bitter coffee: If your coffee tastes bitter, try using a coarser grind size, reducing the amount of coffee, or shortening the steeping time.
3. Difficult plunging: If pressing the plunger is difficult, ensure that your grind size is not too fine, and make sure the paper filter is properly rinsed and seated in the filter cap.
Cleaning and maintenance
Proper cleaning and maintenance of your AeroPress will ensure it continues to produce great coffee for years to come.
Here’s how to keep your AeroPress in top condition:
1. Disassemble: After each use, disassemble the AeroPress by removing the filter cap and plunger.
2. Rinse: Rinse all parts with warm water to remove coffee residue. Pay special attention to the rubber seal on the plunger, as coffee oils can build up over time.
3. Deep clean: Periodically, give your AeroPress a deep clean by soaking the parts in warm, soapy water for a few minutes. Use a brush or sponge to scrub away any stubborn residue.
4. Dry: Allow all parts to air dry completely before reassembling and storing your AeroPress.
AeroPress vs. French Press coffee machine
While both the AeroPress and French Press are popular coffee press methods, they offer different brewing experiences and results.
Here are some key differences:
- Brewing time: The AeroPress typically requires a shorter brewing time (1-2 minutes) compared to the French press (4 minutes).
- Grind size: The AeroPress uses a medium-fine grind, while the French press requires a coarse grind.
- Flavour profile: The AeroPress produces a smoother, less acidic coffee, while the French press yields a richer, fuller-bodied brew with more oils and fine particles.
- Portability: The AeroPress is more portable and compact, making it ideal for travel and outdoor use.
Conclusion
The AeroPress is a versatile and user-friendly coffee press that offers a unique and enjoyable brewing experience. By following the steps and tips outlined in this guide, you can master the art of AeroPress coffee and enjoy a delicious cup every time.
Explore our range of AeroPress accessories and coffee grinders to enhance your brewing process and elevate your coffee experience.
Happy brewing! ☕✨


